Welcome to the AT5600 Demo system
Quick Start Guide if you are new to the AT Testers, and have received an AT5600 Demo unit to try
The following pages will guide you through the set up and testing of a sample transformer to demonstrate the capabilities of our AT5600
Whether you are a new customer, or an existing customer migrating from our AT3600 or ATi tester, this tutorial will guide you through the set up and testing of a transformer, using the following pages and the supplied demo unit
The Demo Kit is designed to be used with a supplied Voltech Demonstration AT5600 and either...
a. A sample of your own transformer with a specially prepared fixture, and pre-written test program.
b. A Voltech library sample transformer, again with a bespoke test fixture and pre-written program.
c. For existing customers with existing programs and fixturing we invite you to try your own parts.
The following sections will guide you through...
a. The unit set up.
b. AT EDITOR set up and use - running a program directly from the AT Editor for test development
c. AT SERVER set up and use - demonstrating the ability of the AT Server to send test program to several units and then collect test data back into a central results store.

AT5600 Demo
Click each section to expand or collapse.
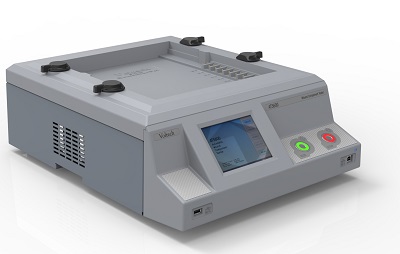
1. Unboxing AT5600
First remove the AT5600 from its packaging
also in the box you will find:
a. USB cable for AT Editor use
b. Ethernet cable for AT Server use.
c. Safety interlock plug
d. Power cord
2. Interlock Bypass Plug
This unit includes HIPOT safety tests to 5 kV AC/7 kV DC.
The AT5600 should always be used with a safety system, such as our own Light Curtain, or alternatively your own system to protect the operator from risk of shock. This protection is enforced by the Interlock Port on the rear of the unit. If a valid safety device is not connected to this port, then the unit will not generate any dangerous voltages.
For the purposes of this demonstration we have provided an override plug that bypasses this protection.
Customers are warned that this can make the unit dangerous if transformers are touched during testing, and as such the demonstration unit should only be used with the by-pass plug fitted by qualified personnel.
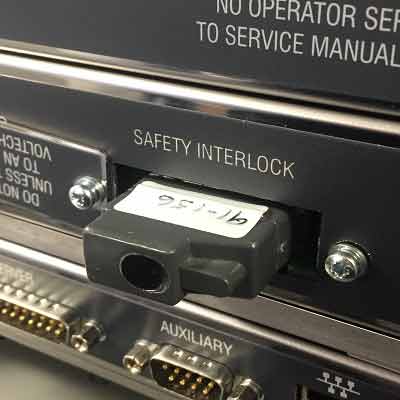
To fit the Interlock bypass plug
a. disconnect all power from the unit
b. remove the two M3 screws to remove the Interlock cover plate on the rear of the unit..
c. fit the interlock bypass plug as shown.

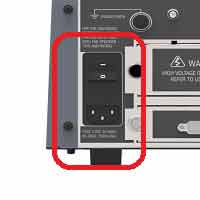
3. Power Supply
Finally connect the IEC mains plug onto the AT5600, and power on the unit
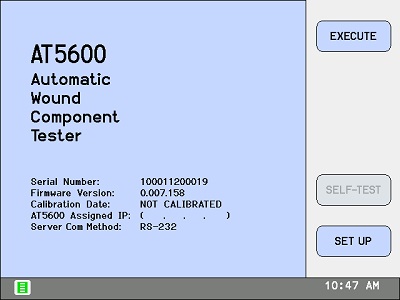
4. AT5600 Power on Screen
The AT5600 will then display to following screen. The screen shows Serial number Firmware version Calibration date Server settings The Green icon in the bottom left indicated that the safety interlock is closed; i.e. that the unit can generate high voltages. If this icon is red, then the means the safety interlock is open. If this is the case, then check the fit of the interlock plug in the rear of the unit.
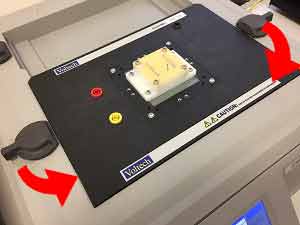
1. Fit Test Fixture
The Voltech fixture system enables you to rapidly customise the AT5600 to suit an almost infinite variety of transformer styles.
Provided in the demo kit will be a 2 custom fixture plates (22051 + 220-053)
Fit the one of the fixtures to the test bay as shown.
Note that the 40 spring probes of the AT5600 interface with the 40 contact pins on the bottom of the fixture
The fixture should spring on these 40 probes when gently pushed down.
Hold the fixture down and rotate the two locking knobs to secure it in place.

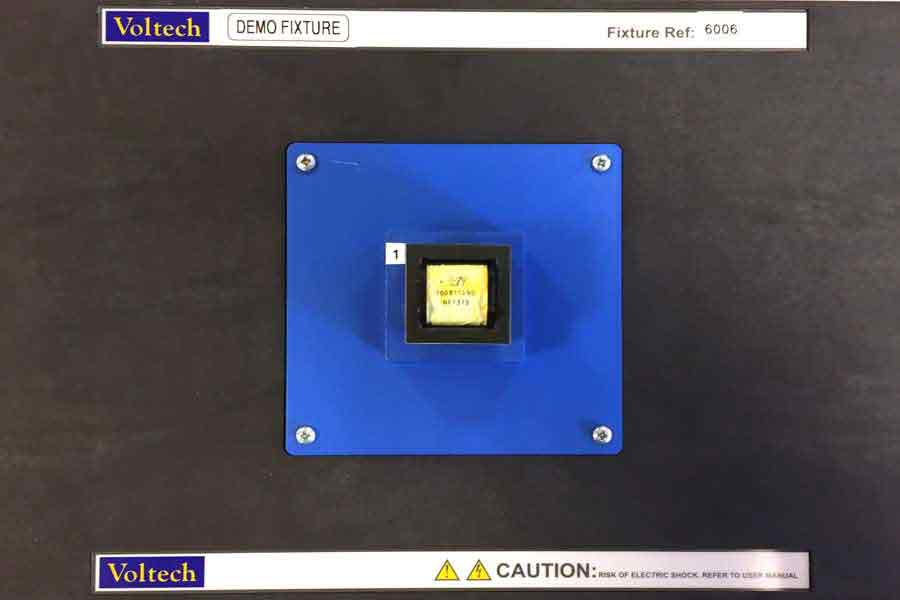
2. Fit Sample Transformer
Also provided will be Voltech Library sample transformers (220-052 + 220-054)
Fit this to the fixture as shown below
Below are examples of the library transformers and fixtures for your reference
3. Voltech Library Samples
220-051 AT5600 SMPS Demo – Fixture
220-052 AT5600 SMPS Demo - Transformers
And /Or
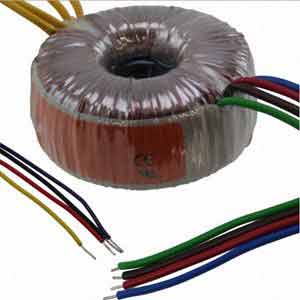
220-053 AT5600 Mains Toroid Demo - Fixture
220-054 AT5600 Mains Toroid Demo - Transformers
1. AT EDITOR Installation
The AT Editor software allows you to create test programs (*.ATP files) for use with a Voltech AT Tester. The AT5600 requires AT Editor version v3.56 or later.
The below demo uses the latest V4 dotNET Editor.
Legacy AT3600 and ATi customers should be aware that any programs created on earlier versions of AT Editor will still work on the AT5600, although the latest version of AT Editor and Server are required to communicate with the AT5600.
The AT Editor is free to download from our download page here
Click on the DOWNLOAD button and run the installer once downloaded.
Supports AT5600, AT3600, ATi. MS Windows 7/8/10/11, 32-bit + 64-bit.
2. AT5600 USB Driver Installation
The AT5600 can be used over RS232, like the AT3600+ ATi.
However, to benefit from the improved speed of USB communications, install the AT5600 USB driver
The AT5600 USB driver is free to download from our download page here
Click on the DOWNLOAD button and run the installer once downloaded.
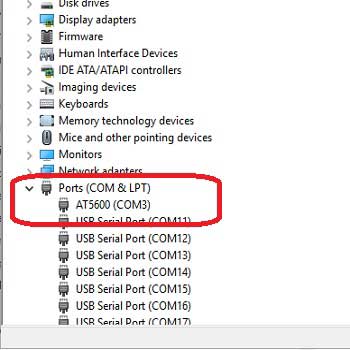
3. USB Check
Once installed, connect the USB cable provided to a USB port on PC you are using, and the other end to the USB port on the AT5600 USB-B port on the front right of the unit.

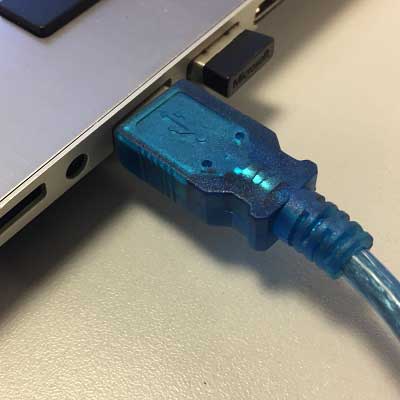
Turn the AT5600 power on, and the PC will automatically detect the AT5600 and assign a COM port to it.
This can be seen in Windows Device Manager on the PC, under the Port (COM and LPT) grouping.
In the shown example, the AT5600 is assigned COM3
The following will walk you through running a test program using the AT Editor.
This is the preferred method for designing and testing and modifying your test program.
Whilst results can be collected electronically using the AT Editor, the AT Server gives the added advantage of a central store of programs for many AT units, and collection of results back to CSV or a single database.
Test Programs that also request Operator number / Batch number/ Serial number will also store this data in the results when using the AT Server
1. GET TEST PROGRAM
First locate the ATP test program file.
If you have supplied one of your own transformers, the ATP program, that we have created for you, will have already been emailed to you.
If you have selected one of our library transformers, the corresponding ATP file can be downloaded here.
If you are a legacy AT3600 or ATi customer, and already have a test program, then transfer your desired ATP program on to the PC.
SMPS Transformer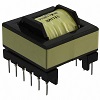
Mains Toroidal Transformer
2. LOAD PROGRAM
Double click on the ATP file you wish to run.
This will automatically open the AT EDITOR and load the program into it.
Click the MINIMISE button in the top right to reveal the test program sequence
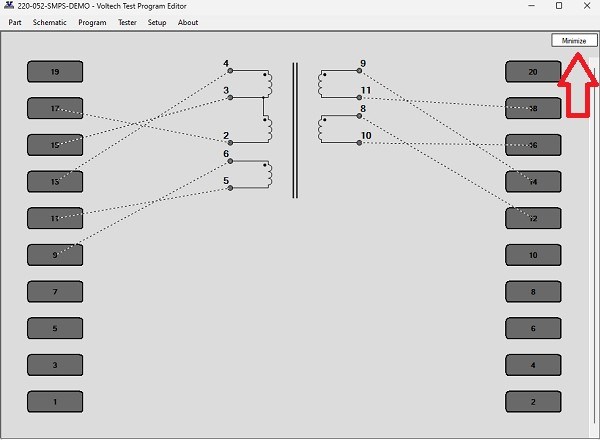
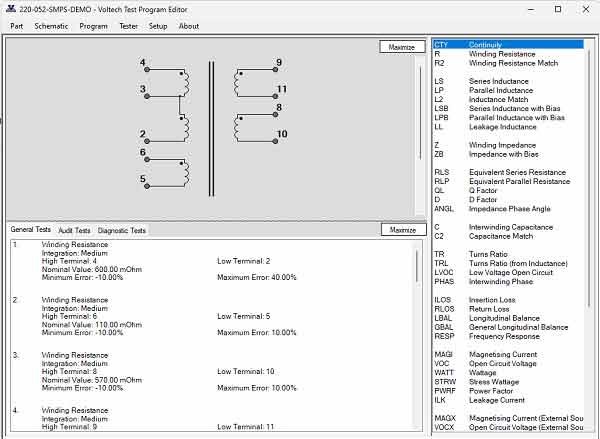
3. EXAMINE PROGRAM
Once MINIMISE is clicked, the screen shows
TOP LEFT - schematic
BOTTOM LEFT - the sequence of tests we are about to run on the transformer
RIGHT - the full list of test the AT5600 can perform, should we wish to add new tests into the program
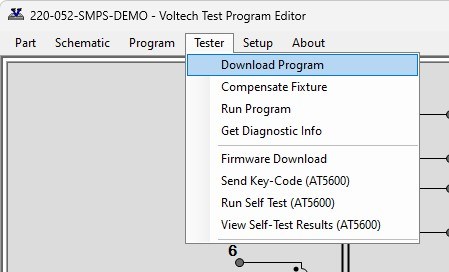
4. PROGRAM DOWNLOAD TO AT5600
On the AT EDITOR menu, select
TESTER>DOWNLOAD PROGRAM
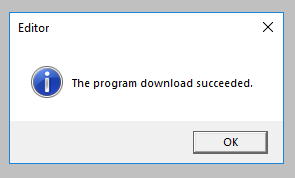
5. DOWNLOAD CONFIRMATION
The AT EDITOR confirms that the program has downloaded to the AT5600
Click OK
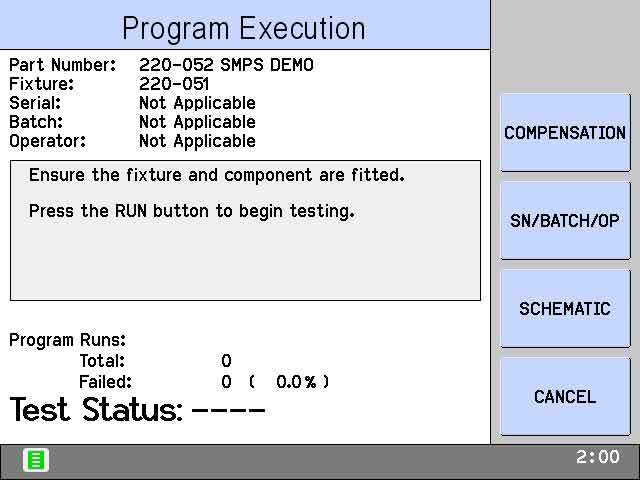
6. AT5600 FRONT PANEL
This download of the program will also be reflected on the AT5600
For now, we will ignore compensation, but will return to it later.
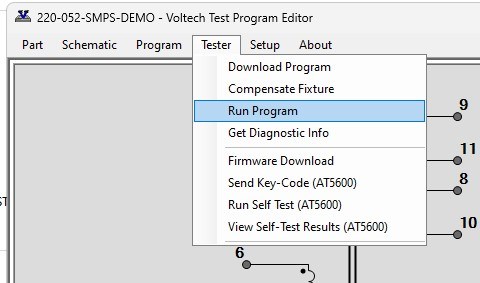
7. RUN PROGRAM
To run the test program from the AT EDITOR and return results to the editor, select TESTER>RUN PROGRAM as shown
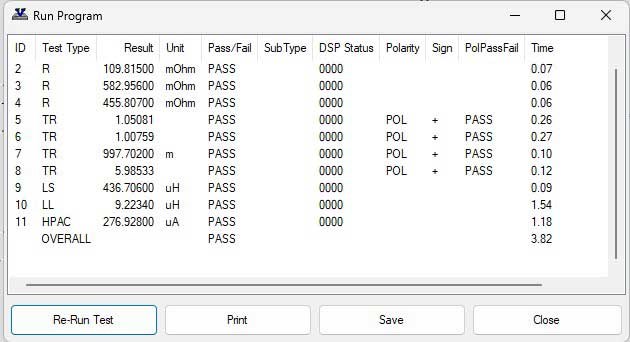
8. RESULTS
The AT5600 will run the sequence of tests as described by the program and return the results to the AT EDITOR as shown.
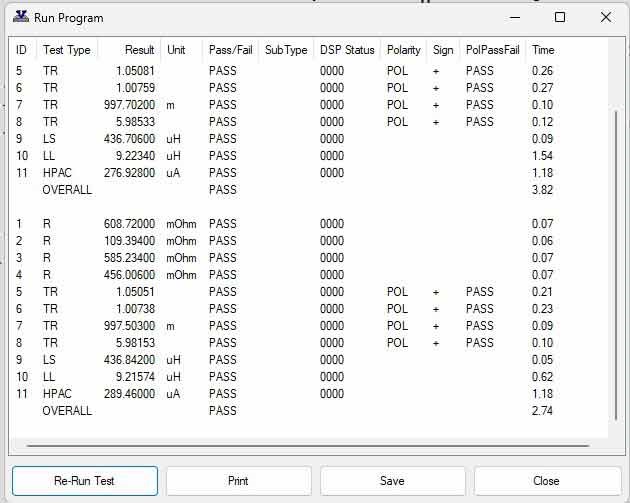
9. RERUN + RESULTS
On the AT Editor dialog box, press RERUN TEST to run the test again
You will find that subsequent runs are faster, as the AT5600 uses the first run to learn the best settings to reach the required signal with optimum speed.
In this example, the test time has reduced from 3.82 seconds to 2.74 seconds
It also important to note that, in both these times, 1 second is taken up by is the fixed duration HPAC test that dwells for 1.1 second – the remaining 10 tests are executed in 1.64 seconds
The results can be saved to CSV using the SAVE button, or sent to PC printer using the PRINT button.
1. AT SERVER Installation
Once test programs have been created and proven using the AT Editor, The AT Server software acts as a central file server for one set of test programs to many AT units
The AT5600 requires AT Server version v3.40 or later
New users should be aware that the “AT SERVER” is not to be confused with the typical use of the word “Server” in the IT infrastructure sense.
It is merely a desktop PC application that allows you to use 1 central folder to store ATP programs (to send to each tester) , and 1 central folder to store ATR/ CSV results (that come back from the unit after each test run)
Customers usually set these folders to be on their network file server to gain the advantages of backups and site-wide visibility and access.
Customers can choose
1) One AT Server running on a PC. This simultaneously connects to several AT testers. This gives each AT Tester access to the results folder and program store folder.
Or
2) Due to the low cost of PCs, many customers prefer to use one AT Server + PC next to each AT Tester.
They then point all the separate AT Server programs to the same results and programs folder.
This gives each station a larger display of the test results on the PC, but all units can still share the same common network programs folder and results folder.
Legacy AT3600 and ATi customers should be aware that the latest version of AT Server is required to communicate with the AT5600.
The new version still supports the AT3600+ ATi, as well as program and results storage in the same way that you are familiar with.
The new version simply allows communication to the AT5600 and adds Ethernet communication for the AT5600 too.
The AT Server is free to download from our download page here
Click on the DOWNLOAD button and run the installer once downloaded.
Supports AT5600, AT3600, ATi. MS Windows 7 / 8 / 10, 32-bit + 64-bit.
2. COMMS Setup
For this demo we will use the Ethernet port on the AT5600 to communicate with the AT Server
Legacy customers should be aware that the At Server still supports RS232 communications for the AT3600+ ATi and AT5600 if desired, but also allows Ethernet communications with the AT5600.
IMPORTANT: Company IT departments may have network restrictions for staff adding new equipment to your DHCP network or may have firewall restrictions on your AT SERVER PC or NETWORK.
Check with your company IT if these permissions need to be changed to use the AT5600 and AT SERVER.
2.1. Click the icon to start the AT SERVER

2.2. Tick the check box for "Enable network communications"
This instructs the At Server to allow IP communications as well as the legacy RS232 comms.
Then click CLOSE to close the dialog box
Then RESTART the AT SERVER program to invoke this change.

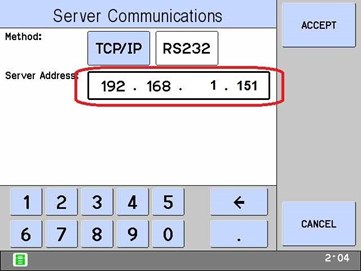
2.3. AT5600 IP Setup
On the AT5600 front screen, select
SET UP
then
SERVER
click on
TCP/IP to enable it
Then enter the IP address of the PC that is running the AT SERVER
here, it is 192.168.1.151
then press ACCEPT to accept changes
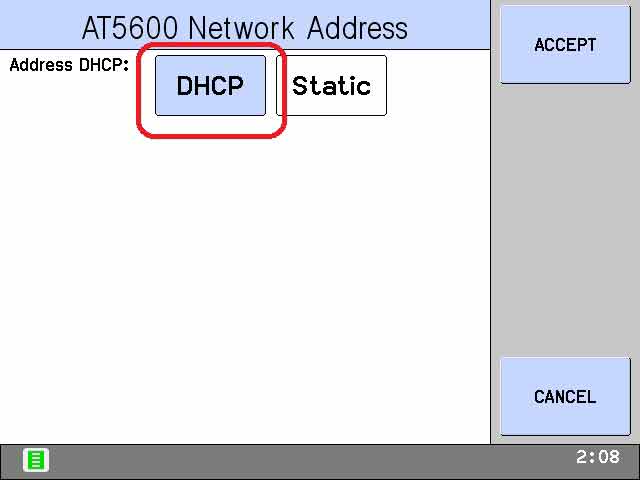
2.4. AT5600 DHCP setup
Next, select NETWORK on the AT5600
Ensure that DHCP is set to ON
This instructs the AT5600 to look for your network DHCP server to allocate the AT5600 IP address automatically
Select ACCEPT, then BACK to return to the front panel home screen.
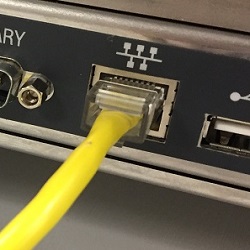
2.5. Connect
Connect the AT5600 Ethernet port to your network using the standard ethernet cable provided.
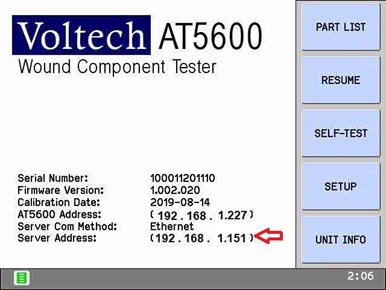
2.6. Confirm.
Once connected the AT5600 will display both
a. its own IP address (here 192.168.1.227)
b. the address of the PC running the AT Server (here 192.168.1.151)
3. PROGRAM Storage and RESULTS Storage Setup
On your PC desktop create 2 folders
"AT PROGRAMS"
"AT RESULTS"
These can be in any location, or on a mapped network drive, but for simplicity we have used the desktop in this demo.
Next, COPY any *.ATP test programs you wish to use into the AT PROGRAMS folder.
We will now instruct the AT SERVER to use these for
A. program storage (to send to any AT connected) and
B. results storage (for results coming back from the ATs connected)
respectively.
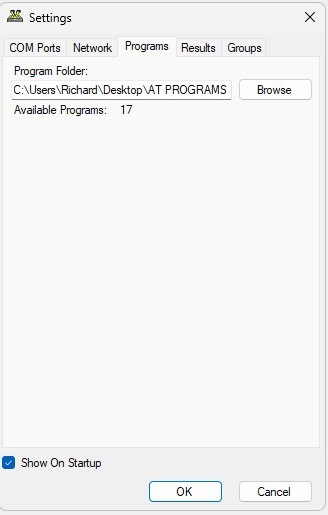
3.1. Set Directories
On the AT SERVER, select Settings / Programs from the top menu
Browse to your program folder using the BROWSE dialog box
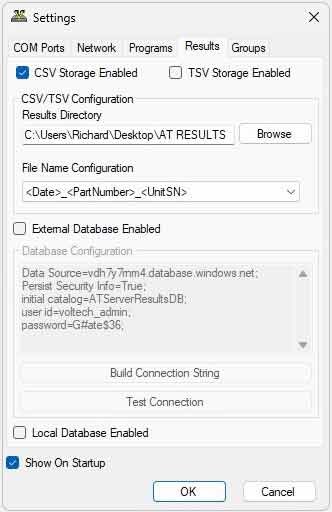
On the AT SERVER, select Settings / RESUTLS from the top menu
Browse to your results folder using the BROWSE dialog box, and enable CSV storage.
4. Test of COMMS
4.1. COPY PROGRAMS
Copy the AT programs (*.ATP files) that you wish to use into the desktop AT PROGRAMS folder.
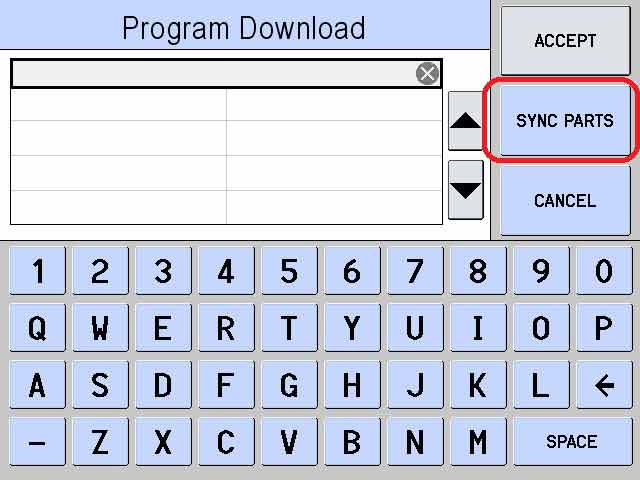
4.2. SYNCHRONISE
On the AT5600, select
PART LIST
then
SYNC PARTS
4.3. COMMS WINDOW
The AT5600 will then automatically open a window on the AT SERVER and fetch a list of available programs (in the AT PROGRAMS folder) to the AT5600 tester.
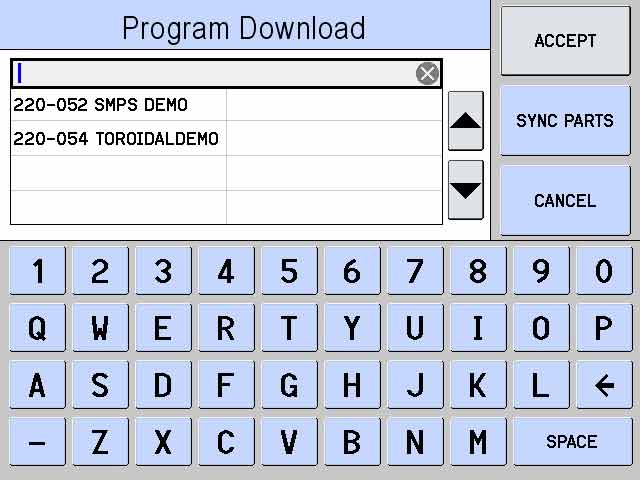
4.4. PROGRAM LIST
The program names contained in the AT PROGRAMS PC folder will then be displayed on the AT5600 front panel.
Legacy users should note that unlike the AT3600, the AT5600 will store the list of program names (but not the actual programs) in the AT5600.
This means that you only use "SYNC P/N LIST" when new programs have been added to your program store folder.
This saves time when you have many test programs, as you only need to refresh the list when it changes.
The following will walk you through running the same test program as before, but this time using the AT SERVER.
Here, The AT5600 will request the program, via the SERVER from the AT PROGRAMS folder, run it several times and send the results to the AT RESULTS folder that we have already set up.
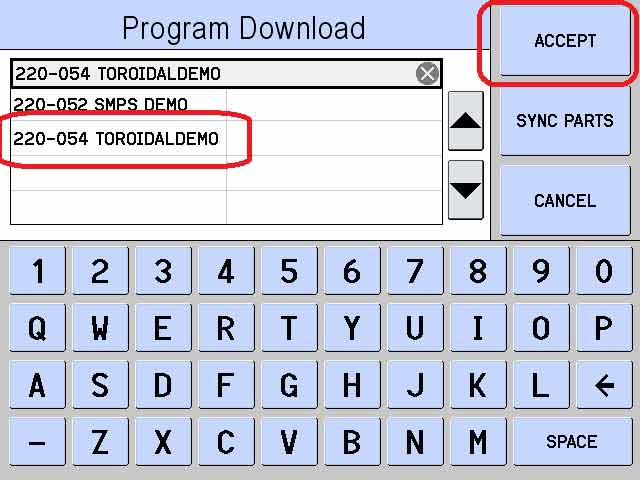
1. SELECT TEST PROGRAM FROM SERVER
On the AT5600, select EXECUTE, click the part number of the test program, and then ENTER to select it
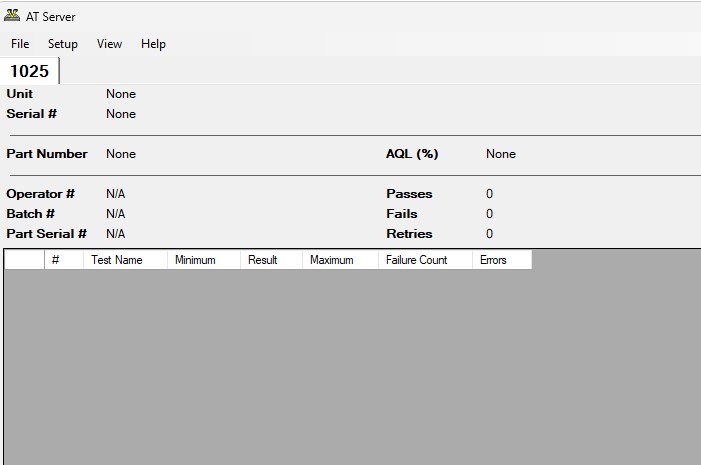
The AT5600 will beep and download the program, and then show the EXECUTE MODE screen, with the selected program part number shown.
2. RUN PROGRAM
Next will be shown a Compensation screen. Ignore this for now, by clicking DONE
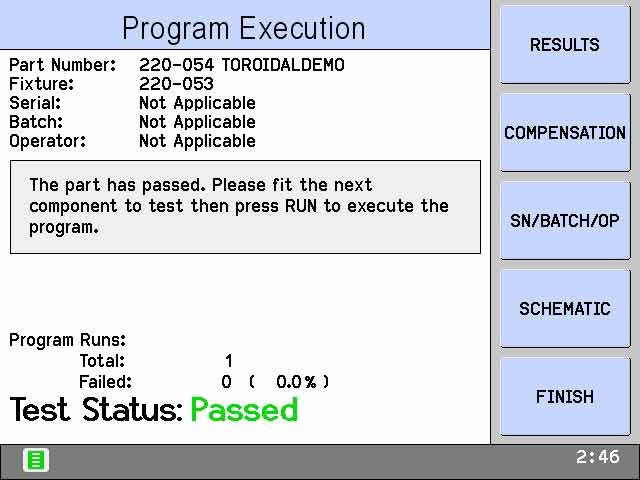
Next press RUN on the front panel
The program will run and an overall test status will be shown on the screen.
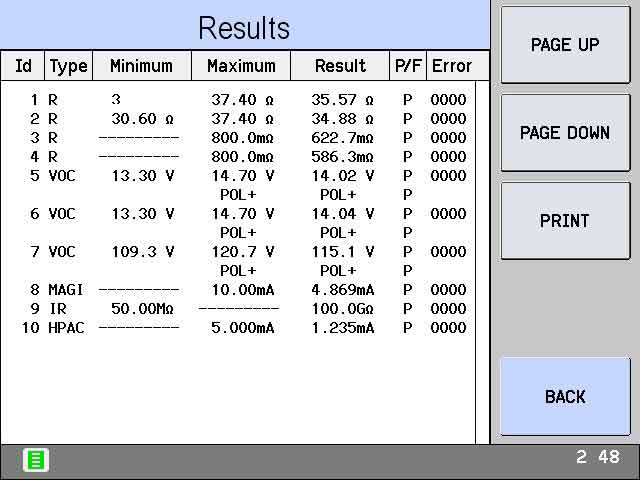
3. RESULTS on AT5600
Press the RESULTS button to view the last run results on the AT5600
Then press BACK to return to the Execute screen
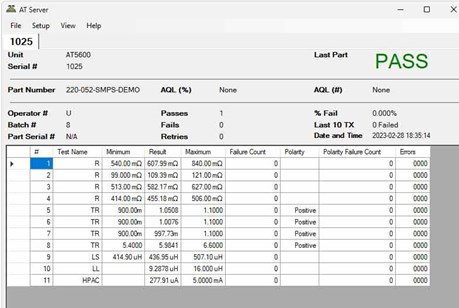
4. RESULTS on AT SERVER screen
The ATP program will have been supplied to you with "SEND RESULTS TO SERVER" enabled in the program options. (this is set per program by using the AT EDITOR). This is so that customers can choose if results are stored by specific part.
You will see that the same results also are sent to the AT SERVER with every RUN.
Press the RUN button on the AT5600 a few more times to test the part again and again, and hence send more results to the AT SERVER.
As with the AT EDITOR runs, you will find that 2nd/3rd/4th runs are faster than the first.
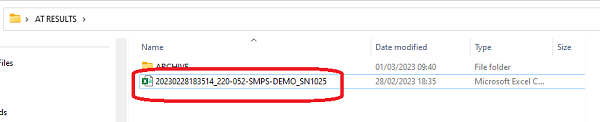
5. RESULTS in AT SERVER folder
As well as showing the results on the AT SERVER screen, the results are also being written to a file in the specified results FOLDER.
This file will remain locked as long as the AT SERVER results window is open (although you can copy and paste it out of the folder)
Close the AT SERVER results window, by clicking on the red X in the top right corner of the AT results window.
Navigate to to the Desktop/AT RESULTS folder that we created earlier, and you should see results files
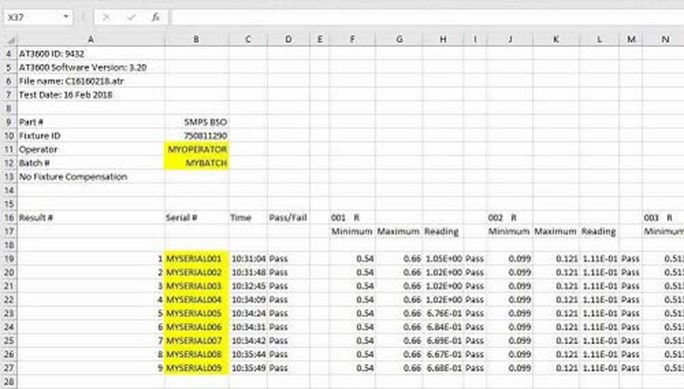
6. VIEWING RESULTS in EXCEL
The file format of the results file (*.CSV) is the standard CSV (comma separated variables) format.
The file can easily be opened in EXCEL
the Yellow cells indicate where the data for Batch number and operator number and individual serial number would be stored if requested in the ATP program
The previous pages will have guided you though the basic operation of the AT5600
The provided fixture and program were designed to give you a feel of the speed and simplicity of test, once a program has been written and tested and a fixture obtained to simplify and speed up connection.
Open and Short Circuit compensation
Measurement accuracy can be further improved by using the optional compensation on the AT5600.
This will effectively remove any measurement effect due the the fixture or wiring used to connect to the transformer to the AT5600.
Programs can be run without compensation, but in some cases (for example transformers with very low winding resistance, typically < 0.5 ohm) it will allow you to get maximum accuracy.
Empty bobbins have been provided with the sample transformers to allow you to experiment with this.
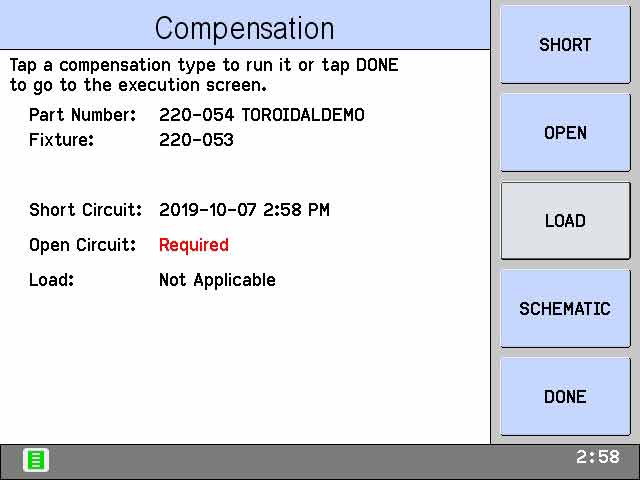
Short circuit compensation is performed using the bobbin marked “S/C” - this effectively fits a short in place of each winding
Open circuit compensation is performed using the bobbin marked “O/C” - this has no connections, but does ensure that the source and measure pair on each node are connected, and allows the contact resistance of connection to be removed from measurements.
Compensation only needs to be performed once before each batch run.
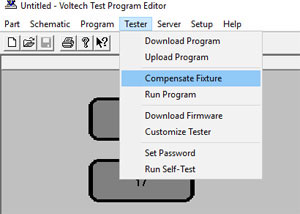
If using the AT Editor, you can apply compensation by first downloading the program as normal, then selecting Tester>Compensate Fixture.
See user manual 14.5.11 and 13.5 for more details
If using the AT Server, it can be applied by selecting the COMPENSATE button on the AT5600 screen, after program load. See user manual 8.1.6.4 and 13.5 for more details.
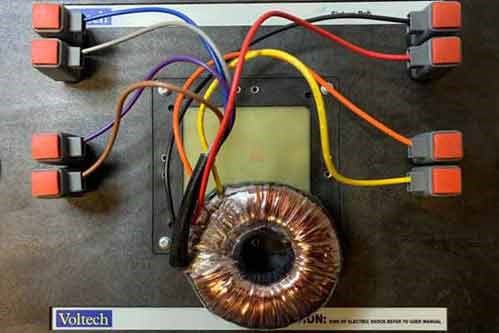
Testing Other Transformers
If you have requested them, you can also use the Universal Fixture (91-186) and connection lead set (78-030) to test other transformers.
Using the connection lead set can sometimes be slower than a bespoke fixture, and hence not always suited for fast volume production testing.
However it will allow you to experiment with other transformer types during R+D, before you need to commit to a bespoke fixture.
See user manual Chapter 14 for full details.
Many thanks for your time to try the AT5600 !